Is Your Org... Lightning Ready?
- Kirk Steffke

- Jun 26, 2017
- 4 min read
Updated: Jan 7, 2022

Recently, I wrote a blog post for app creators to help understand what makes an “Lightning Ready” on the AppExchange. In this post, I’ll cover an area more broadly applicable to help all those Awesome Admins out there plan for and make that org transition to the Lightning Experience.
Dueling UIs: Salesforce Classic and Lightning Experience
A platform sea-change is afoot. Are you a new Salesforce customer or new to Salesforce as a whole? You’ve got it good! You’ve probably seen a lot of old screenshots in documentation and videos and have had a good ol’ chuckle at what the old UI looked like. We’ve come a long way, haven’t we? Maybe you’ve been in the ecosystem for a while and you’re not laughing. You’re working in the Classic UI dreaming about the Lightning Experience or have already started planning for your orgs migration to it. Maybe you’ve already made the migration for your org and if so… high five!
As mentioned in the “apps” blog post, there are plenty of great resources available that define Salesforce Classic and the innovations introduced via the new Lightning Experience. If you’re not sure what Classic vs Lightning is, check out this Salesforce Trailhead Module, Lightning Experience Basics, to get up to speed.
The Lightning Experience Migration Assistant

While in the Classic UI, navigate to the setup menu. You’ll likely see the above graphic.
Clicking on the “Get Started” button will launch the “Lightning Experience Migration Assistant.” There is a wealth of information in this tool, full of links to external materials to learn more.
Major Objectives
1. Learn
2. Check Readiness
3. Preview
4. Optimize with Features
5. Set Up Users
6. Turn it On

Learn
Introducing Lightning Experience: About a 2.5 minute video that gives a quick overview of the process and your next steps.
Compare Lightning Experience and Salesforce Class: Check out an updated feature comparison of what’s available in Lightning vs what’s already in Classic. We’re not quite at feature parity where all the standard classic offering are in Lightning, but we’re getting there. While on this step, take a moment to look at the most recent release notes and look at all the new features. Now look to see if you see any mention of those features being available in Classic. Pretty good motivation to start down the migration path, right?
Get Ready to Migrate to Lightning Experience: The full Trailhead Trail that starts out with the Lightning Experience Basics module mentioned above. In addition, these modules are also included:
Check Readiness

The next step in the process is an automated readiness check. Click on the “Check Readiness” button and then you’ll likely be prompted to grant the “Lightning Readiness Check” app access to your Salesforce Org.

Click on the blue “Allow” button.
Next, you’ll need to specify which major cloud you want to check. Click on either one of the options

Within a few moments, you’ll receive confirmation that an email has been sent to you with your readiness audit’s results.


The email will look like the following and include an attachment.

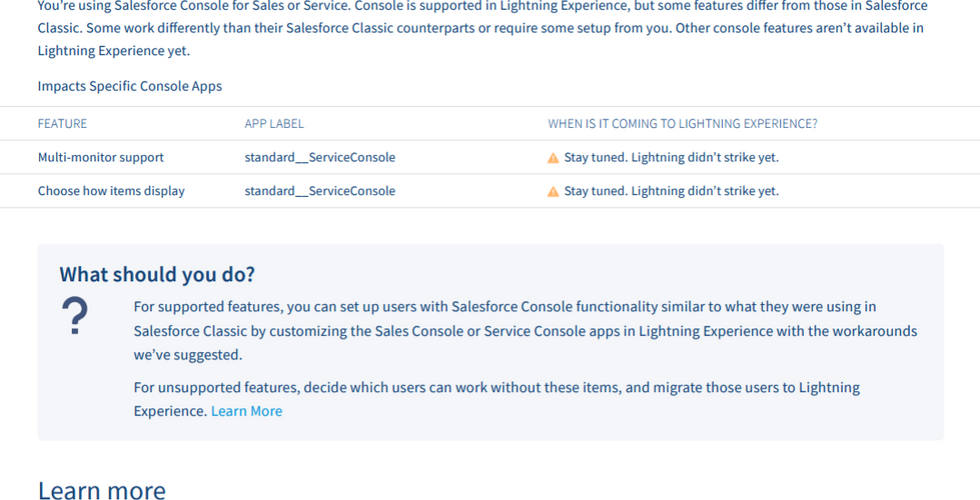
The attachment will be your Lightning Readiness check’s results. It will provide a list of all the areas your orgs is ready for as well as the areas that need further work.
Preview

This still will give you a glimpse of what your org will look like when you enable the Lightning Experience. Keep in mind that once enabled, you and your users will be able to toggle between the two UIs. In this preview, you can go back to your normal environment by using the “Exit and Return to the Migration Assistant” link in the blue bar across the top.

Optimize with Features

There are some great features that make Lightning even better; this step shows some of them (e.g. Shared Activities, News, Social Accounts, Contacts, and Leads, and Notes) as well as a requirement (My Domain).
My Domain: Customize how your users log into your org while improving security and allowing for some custom branding as well.
Shared Activities: Tasks don’t have to be associated with individual Contacts; relate multiple Contacts to Events and Tasks.
News: Display relevant happenings in the news within your Salesforce Org on pertinent records.
Social Accounts, Contacts, and Leads: What’s going on in the various social networks, relating to your Salesforce data.
Notes: A new and improved version of the related “Notes” tool.
Set Up Users

Within this step, learn how to control which, if not all, of your users will be given access to the Lightning Experience.

Turn It On
Finally there - when you’re ready, flip the switch and make the Lightnign Experience available to your users. Don’t forget the importance of letting your end-users know in advance and provide them with some of those training materials from Trailhead.

Have you made the switch? What were your biggest challenges and what would you do different? Tweet us and let us know! @CRMScience #LightningReady


Comments